Difference between revisions of "Getting Started Part 4"
Yvonne.milne (Talk | contribs) |
Yvonne.milne (Talk | contribs) |
||
| Line 4: | Line 4: | ||
[[Introducción Parte 4|Lea ésto en español]] | [[Introducción Parte 4|Lea ésto en español]] | ||
| − | + | [[Getting Started Part 1]] | |
| − | + | ||
| − | + | [[Getting Started Part 2]] | |
| − | [[ | + | [[Getting Started Part 3]] |
| + | ==Deploying and Testing your App locally== | ||
| − | + | ===Publish=== | |
| + | [[{{ns:file}}:getstart4_1.png|450px|thumb|left|link={{filepath:getstart4_1.png}}|App Settings: Published]] | ||
| + | |||
| + | |||
| + | |||
| + | Before deploying your App for the desktop runtime client, it needs to be 'published'. | ||
| + | |||
| + | Open the Settings from the Modebar, click the '''Published''' checkbox (True) and click '''Done'''. | ||
| + | |||
| + | Once an App is published, its tile will appear in the Home workspace App Center. | ||
| + | |||
| + | For information on configuring the App's tile see [[Lianja App Center Tiles]]. | ||
| + | |||
<br clear=all> | <br clear=all> | ||
| − | === | + | ===Quick Deploy=== |
| + | [[{{ns:file}}:getstart4_2.png|450px|thumb|left|link={{filepath:getstart4_2.png}}|Quick Deploy]] | ||
| − | |||
| − | To | + | To deploy for the desktop runtime, click the '''Quick Deploy''' toolbutton in the headerbar. |
| + | |||
| + | Click '''Setup'''. This will take you to the Deploy workspace to setup the files you want to deploy. | ||
| + | |||
| + | This is done once, then you can deploy using the current settings multiple times. | ||
<br clear=all> | <br clear=all> | ||
| − | = | + | [[{{ns:file}}:getstart4_3.png|450px|thumb|left|link={{filepath:getstart4_3.png}}|Deploy Workspace]] |
| − | |||
| − | + | In the Deploy workspace, click the arrow to the left of '''Apps''' then scroll down and click the checkbox next to '''myapp'''. | |
| + | |||
| + | Reselect '''Pages''' from the Modebar. | ||
<br clear=all> | <br clear=all> | ||
| − | [[{{ns:file}}: | + | [[{{ns:file}}:getstart4_4.png|450px|thumb|left|link={{filepath:getstart4_4.png}}|Quick Deploy: Preview]] |
| − | |||
| − | + | Click '''Quick Deploy''' again and click the '''Preview''' button to view the files that will be deployed. | |
<br clear=all> | <br clear=all> | ||
| − | = | + | [[{{ns:file}}:getstart4_5.png|450px|thumb|left|link={{filepath:getstart4_5.png}}|Quick Deploy: Commit]] |
| − | |||
| − | |||
| − | + | Then click '''Commit''' to deploy the files. | |
| − | + | <br clear=all> | |
| + | |||
| + | [[{{ns:file}}:getstart4_6.png|450px|thumb|left|link={{filepath:getstart4_6.png}}|Quick Deploy: Deployment Completed]] | ||
| + | |||
| + | |||
| + | |||
| + | Click '''Close''' once the deployment has completed. | ||
<br clear=all> | <br clear=all> | ||
| − | === | + | ===Lianja App Center=== |
| + | [[{{ns:file}}:getstart4_7.png|450px|thumb|left|link={{filepath:getstart4_7.png}}|Log into Desktop Client App Center]] | ||
| − | |||
| − | |||
| − | + | Now, double-click on the '''Lianja App Center''' shortcut on your desktop - this is the desktop runtime client. | |
| + | |||
| + | Enter the default Username '''admin''' and the default Password '''admin'''. | ||
| + | |||
| + | Then click '''Login'''. | ||
<br clear=all> | <br clear=all> | ||
| + | |||
| + | [[{{ns:file}}:getstart4_8.png|450px|thumb|left|link={{filepath:getstart4_8.png}}|Open App in App Center]] | ||
| + | |||
| + | |||
| + | |||
| + | You should now see your App's tile. | ||
| + | |||
| + | Click the tile to run the App. | ||
| + | |||
| + | <br clear=all> | ||
| + | |||
| + | [[{{ns:file}}:getstart4_9.png|450px|thumb|left|link={{filepath:getstart4_9.png}}|Running App in App Center]] | ||
| + | |||
| + | |||
| + | |||
| + | Now you can view and test your App running in the desktop client. | ||
| + | |||
| + | <br clear=all> | ||
| + | |||
| + | ===Deploying and running Web Apps=== | ||
| + | [[{{ns:file}}:getstart4_10.png|450px|thumb|left|link={{filepath:getstart4_10.png}}|Deploy Web App in Web App View]] | ||
| + | |||
| + | |||
| + | |||
| + | To deploy a web App, click on the '''Web App View''' toolbutton in the Headerbar to open your App in Web App View. | ||
| + | |||
| + | Then click '''Deploy'''. | ||
| + | |||
| + | <br clear=all> | ||
| + | |||
| + | [[{{ns:file}}:getstart4_11.png|450px|thumb|left|link={{filepath:getstart4_11.png}}|Web App View Preview: Login in Browser]] | ||
| + | |||
| + | |||
| + | |||
| + | Then click '''Preview'''. | ||
| + | |||
| + | This will open the App in your default browser. | ||
| + | |||
| + | Log in to the web client Lianja App Center using the default Username '''admin''' and the default Password '''admin'''. | ||
| + | |||
| + | Note that once you have an authenticated session running in the browser, you can Deploy and Preview the App without having to login again. | ||
| + | |||
| + | <br clear=all> | ||
| + | |||
| + | [[{{ns:file}}:getstart4_12.png|450px|thumb|left|link={{filepath:getstart4_12.png}}|Web App View Preview: App Center in Browser]] | ||
| + | |||
| + | |||
| + | |||
| + | You should now see your App's tile. | ||
| + | |||
| + | Click the tile to run the App. | ||
| + | |||
| + | <br clear=all> | ||
| + | |||
| + | [[{{ns:file}}:getstart4_13.png|450px|thumb|left|link={{filepath:getstart4_13.png}}|Web App View Preview: Running Web App in Browser]] | ||
| + | |||
| + | |||
| + | |||
| + | Now you can view and test your App running in the web client. | ||
| + | <br clear=all> | ||
| + | |||
[[Category:Getting Started]] | [[Category:Getting Started]] | ||
Revision as of 09:37, 12 July 2017
Contents
See Also
Deploying and Testing your App locally
Publish

Before deploying your App for the desktop runtime client, it needs to be 'published'.
Open the Settings from the Modebar, click the Published checkbox (True) and click Done.
Once an App is published, its tile will appear in the Home workspace App Center.
For information on configuring the App's tile see Lianja App Center Tiles.
Quick Deploy

To deploy for the desktop runtime, click the Quick Deploy toolbutton in the headerbar.
Click Setup. This will take you to the Deploy workspace to setup the files you want to deploy.
This is done once, then you can deploy using the current settings multiple times.

In the Deploy workspace, click the arrow to the left of Apps then scroll down and click the checkbox next to myapp.
Reselect Pages from the Modebar.
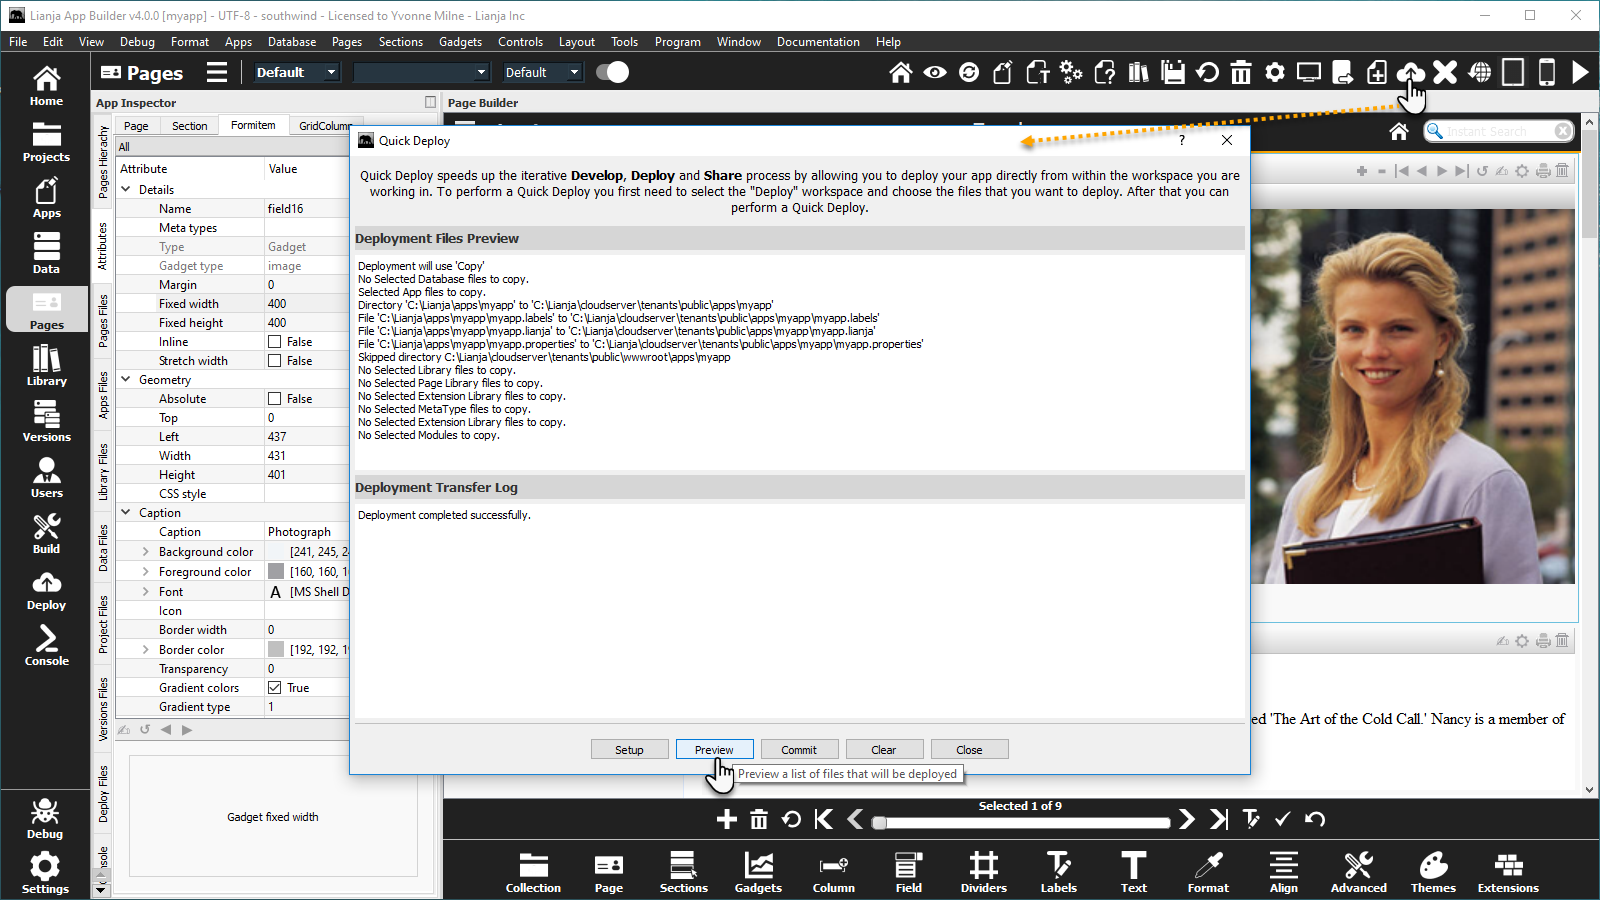
Click Quick Deploy again and click the Preview button to view the files that will be deployed.

Then click Commit to deploy the files.

Click Close once the deployment has completed.
Lianja App Center

Now, double-click on the Lianja App Center shortcut on your desktop - this is the desktop runtime client.
Enter the default Username admin and the default Password admin.
Then click Login.

You should now see your App's tile.
Click the tile to run the App.

Now you can view and test your App running in the desktop client.
Deploying and running Web Apps

To deploy a web App, click on the Web App View toolbutton in the Headerbar to open your App in Web App View.
Then click Deploy.

Then click Preview.
This will open the App in your default browser.
Log in to the web client Lianja App Center using the default Username admin and the default Password admin.
Note that once you have an authenticated session running in the browser, you can Deploy and Preview the App without having to login again.

You should now see your App's tile.
Click the tile to run the App.

Now you can view and test your App running in the web client.