Getting Started Part 2
Contents
See Also
Database Search Made Easy
Instant Search
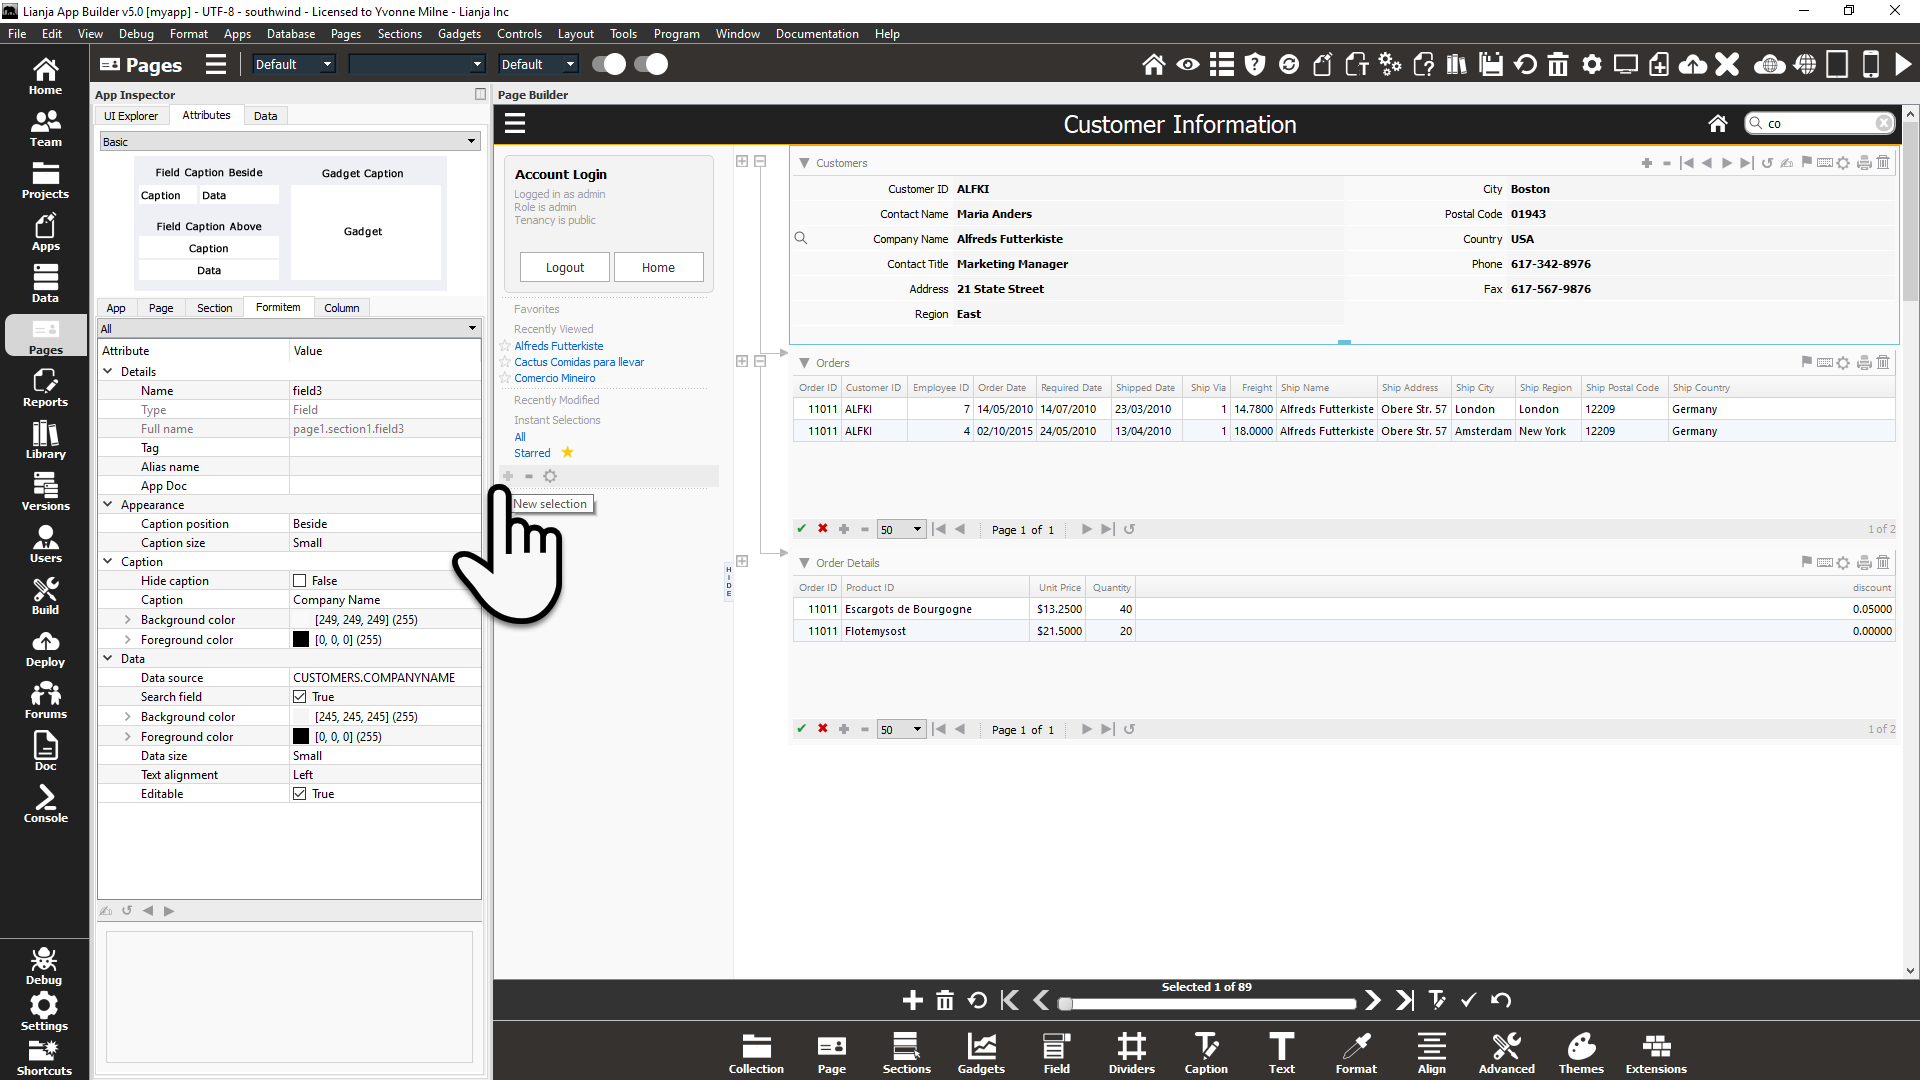
Notice that in the Page Headerbar there is a search box that provides Instant Search across the data that is being displayed in the page.
To use Instant Search you need to specify which field on the page is the Search field.
To do this, click on the caption of the field that you want to use (Company Name here) and it will be selected in the App Inspector.
(If the App Inspector is closed, double-click on the field caption to open the Field Attributes dialog.)
Click the Search field checkbox (True) in the Data sub-section.
The search field will be denoted by a search field indicator (magnifying glass) being displayed to the left of its caption.

Using Instant Search
Typing any text into the Instant search box will now instantly retrieve the first record that corresponds to the search key value.
The navigation controls in the actionbar now move only between records which match the search value.
You can reset the search at any time by clicking on the x located at the right hand side of the instant search box and all records will be available again.

Note that you can hide the search field icon at runtime from the Section Attributes or Field Attributes.
See the Instant Search documentation for more information on other configuration options.
The Search field can also be selected in the Section Wizard when you create a new Section.

Instant Selections
Another powerful built-in feature of any pages that you design is Instant Selections. If you are familiar with Google Gmail labels, then you will feel right at home with Instant Selections - once created, they allow you to restrict the data shown with a single click. Instant selections perform a full text search across all the fields in your database records, but there is no need to create any special indexes or perform a database query operation (SQL or otherwise).
Instant selections are page dependent allowing you to have different views of the data depending upon the page you are viewing.
To add an Instant Selection to your page (you can have different Instant Selections for each page that makes up your app) just click on the + button at the bottom of the left sidebar.
Creating Instant Selections
The Create a Selection dialog will slide in from the left hand side of the main window.
Decide on the label color and caption for your Instant Selection, then specify the text to search for - in this case the Instant Selection will choose only those records containing "USA".
Instant selections can perform a full text search across all data in all fields of all records in a database table, and can optionally filter records based on a query condition.

Using Instant Selections
Activate an "Instant Selection" by clicking on its label in the left sidebar.
The number of records matching the Instant Selection is shown at the top of the page next to its label and the navigation buttons in the actionbar move through the matching records.
You can deactivate the selection by clicking the "All" label.

Here's the Instant Selection in Desktop App View.
Notice also, that data Recently Viewed, Recently Modified, and those records that you denote as Favorites - just click on the star to make a record a Favorite - can be selected just by clicking on the links in the left sidebar.
