Creating a Database and its tables
Select the "Data" workspace.
Select the "Database" Tab.
Overview
A database is a container holding a collection of tables, views, and their associated constraints and business rules. Tables consist of rows and columns, also referred to as records and fields. Each column or field has a name, a data type and a width. It can optionally have decimal places, a description and data validation rules. Data is added to the table by adding rows or records.
Southwind Sample Database
The Lianja App Builder distribution includes the sample southwind database and its tables. It is used in the demo and example Apps (also included in the distribution) and in many of the tutorials and documentation.
Let's have a look at some of the tables in the southwind database and how they can be related.
Customers Table
One of the key tables in the southwind is the customers table. It holds information about customers. Each column - the customers table has 12 columns - holds a specific piece of information about the customer: their name, city, phone number etc. It has multiple rows, each referring to an individual customer.

As well as the contact and address information, the customers table has an additional field: Customer ID (customerid). Each customer has a different customerid, so this gives a unique reference to the customer and their record in the customers table. Here the customerid is an upper-case five letter abbreviation of the customer's name, but we will see other ways to generate a unique key to reference a row, known as the primary key.
Orders Table
The orders table holds information about orders made by a customer, for example the dates when the order was made and shipped and the address where it was shipped.

Notice that the orders table includes a Customer ID (customerid) column. This is called a foreign key. It allows the record in the orders table to be related to the record in the customers table belonging to the customer who placed the order.
The orders table must also have its own primary key to uniquely identify each order. The orders table primary key is Order ID (orderid), a 10 digit numeric.
It also has two further foreign keys: Employee ID (employeeid), which references the primary key in the employees table; and Ship Via (shipvia), which references the primary key in the shippers table.
Employees Table
The employees table holds information about the employee who handled the order.

Shippers Table
The shippers table holds information about the shipping company who shipped the order.

Order_details Table
The order_details table holds information about individual line items for a customer's order. It has an Orderid (orderid) foreign key to relate each order line to its order header in the orders table. It does not need the Customer ID as that information is held in the orders table.

It also includes a Product ID (productid) foreign key to reference the primary key in the products table.
Products Table
The products table holds information about individual products.

Related Tables
Here are the customers, order and order_details tables related using the Relationship Builder.

The top section is a Form Section bound to the customers table.
The middle section is a Grid Section bound to the orders table. The relation between the top section and this section based on the Customer ID means that only orders for the current customer are displayed in the orders grid.
The bottom section is a Grid Section bound to the order_details table. The relation between the middle section and this section based on the Order ID means that only order details for the current order are displayed in the order_details grid.
Points to Consider
Before creating your database and tables, do some planning.
- Database: one or more databases?
Lianja opens one database at a time (note) so make sure all the tables you need for your App are in a single database. But, if you are creating multiple Apps dealing with separate data, these can use separate databases.
- Which information is recurring and which is unique information?
As in the example from the southwind database, there is no need for each line item in the order_details table to store the Customer ID or the shipping information. This information is stored in the orders table. And the orders table does not need complete information about the employee who created the order or the shipping company that shipped it. All it needs is foreign key fields to reference the primary keys in the other tables.
- What should the name, data type and width be for each column?
Meaningful names make them easier to remember (and using tableid for primary and foreign keys is ideal when using the Relationship Builder). Data type: will a particular data type make life easier for your users? For example date columns have a popup calendar. Or easier for development - if you want to be able to carry out mathematical operations, use a numeric or int. Width: think ahead, will the reference number be big enough when you hit order 1 million, not just 1 thousand. And check that the widths and data types of corresponding primary and foreign keys match.
Data Workspace
The Data Workspace is where you perform database administration operations on your data. It also allows you to browse and modify your data and view it in a variety of different data views: Grid, Form and Split View.
Create a Database
To create a new database, either:
- Click the Create a Database tile in the Develop tab in the Home Workspace. This will take you into the Data Workspace.

or
- Select the Data Workspace and click the New Database toolbutton in the Headerbar or the New icon at the bottom of the Database Names panel.

You will be prompted to enter a name for the new database. Click OK to continue or Cancel to cancel.

Your database name must be unique - you will be prevented from using the same name as an existing database.
After you click OK, your new database will be created and opened and the Names tab in the Tables tab will be automatically selected.
Create a Table
With your new database open, you can now start creating your tables.
Click the New icon at the bottom of the Table Names panel.

To open a database:
Select the Data Workspace.
Select the Database Tab.
Double click the database name.
After clicking New, the CREATE A TABLE dialog will be displayed with a range of table templates. The templates are arranged by Table Group, with each group appearing in a Table Category.

You can create all the tables from a Table Group by selecting a category and a group and clicking Create Group.
Or all the tables from a Table Category by selecting a category and the All group and clicking Create Group.
Or even all the template tables by selecting the All category and the All group and clicking Create Group.
After clicking Create the dialog will close and the Table Designer will be displayed with the new table selected and full access to modify its structure.

Note: Prior to v6.3 the Table Names panel was displayed and the new table listed with its columns displayed in the Column Names panel and the attributes for the first column shown in the Column Attributes panel.
The structure of your template table can now be changed.
You can add new columns or change or delete the pre-built columns: see Create and Modify Columns below.
You do not need to use a table template. If you select Blank in the CREATE A TABLE dialog, you can create a table with an empty structure ready for you to define.

After clicking Create the dialog will close and the Table Designer will be opened for your new table.
Another way to create a new table:
Select <new> in the tables combobox in the Table Designer.
Note: Prior to v6.3 the Create A Column panel was displayed.
Next we will see how to create and modify columns.
Create and Modify Columns
Prior to v6.3, the slide-in Create A Column / Modify A Column dialog was where a table's columns were defined. From v6.3, the new Table Designer gives you access to all your database's table structures from one panel.
As mentioned above, each column has a name, a data type and a width and can optionally have decimal places, a description and data validation rules. These are all defined in the Table Designer (note).
Just click a table name in the Table Names panel to select it and load its columns into the Column Names and Column Attributes panels.
Double-clicking a table name also loads its data into the Data Editor panel.
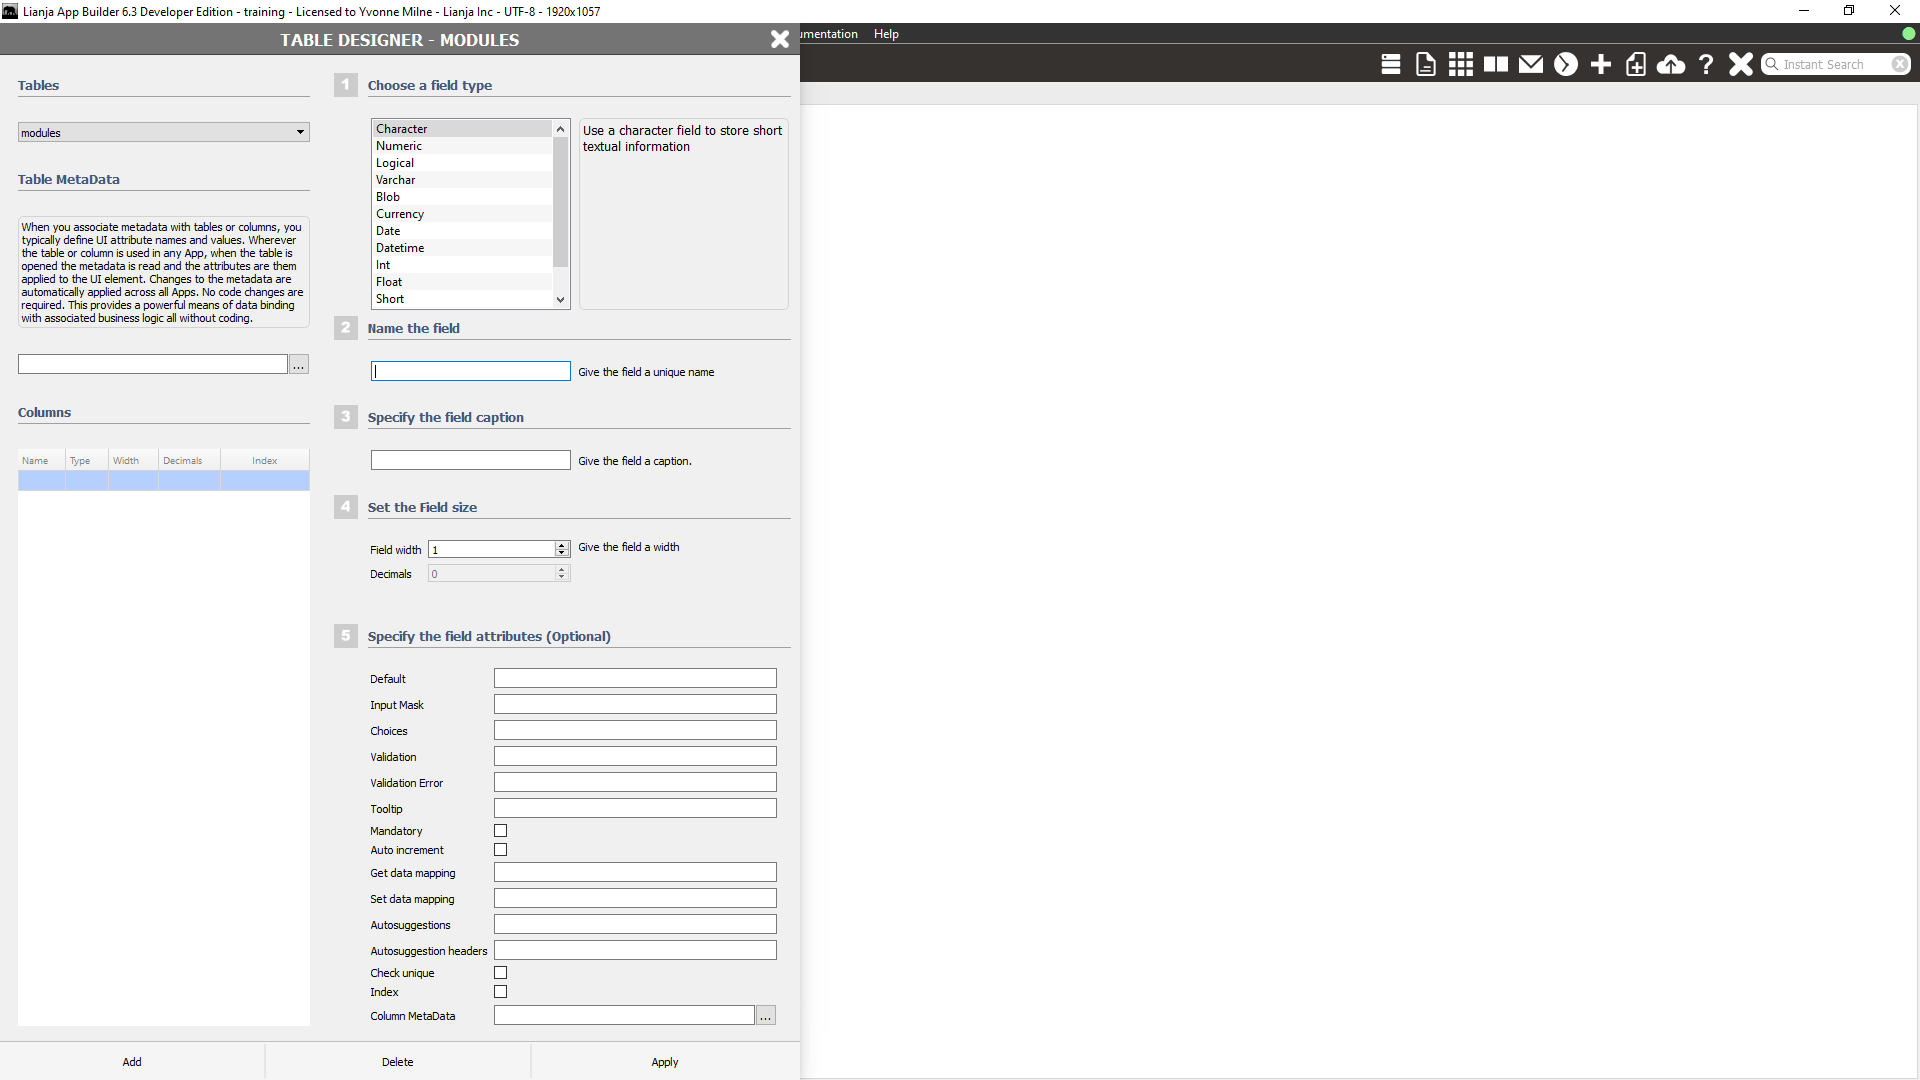
New Column
To add a new column, click the New (+) icon at the bottom of the Column Names panel.

The Table Designer dialog will slide in.

- Choose a field type: select a type from the list. As you scroll through the list, the help panel displays a helpful description.
- Name the field: enter a name that is unique in this table.
- Specify the field caption: enter a caption name. This is the default caption for the column when it is used in Form and Canvas Sections.
- Set the field size: enter the width and decimal places.
Certain data types are fixed width (e.g. Date and Datetime), so the sizes will be grayed out. Decimals will be grayed out for data types that do not have decimal places. See below for more information on column sizes. - Specify the field attributes (Optional). See below.
Click Apply to save the new column and any other changes. Click the (x) in the Table Designer top right corner to close the panel. Any changes that have not been applied will be discarded.
Types and Size
The most commonly used types are as follows:
| Type | Description |
|---|---|
| Character | Used for short textual information, e.g. lastname. Width is 1 to 255 characters. |
| Numeric | Used for numeric data that can be used in calculations, e.g. quantity or (with 0 decimal places) as a reference number, e.g. orderid. Width is 1 to 25 with 1 to 9 decimal places. Note that the width includes the decimal places and decimal point, so a numeric of 10,2 will allow values up to 9999999.99. |
| Logical | Used for short true/false status information, e.g. discontinued. Width is fixed. |
| Varchar | Used for long text, e.g. notes. Width is fixed. Note that the data stored in a varchar is variable length as it is stored in a separate file (.dbt). Varchars can also be referred to as memo fields or memos. |
| Blob | Used for the storage of pictures or other media files, e.g. photo. Width is fixed. Note that the data stored in a blob is variable length as it is stored in a separate file (.dbt). Blobs can also be referred to as object fields. |
| Date | Used to store a date value (month, day, and year), e.g. orderdate. Width is fixed. |
| Datetime | Used to store a date value (month, day, and year) and time information (hours, minutes, seconds), e.g. datecreated. Width is fixed. |
Column Attributes
The column attributes are used to prevent the entry of incorrect data: Auto increment, Mandatory and Validation or aid the entry of correct data, e.g. Default, Input Mask, Choices, Validation Error and Tooltip.
| Attribute | Description |
|---|---|
| Default | The value that will be assigned to the column when a new record is added. This does not make the column read only. |
| Input Mask | An Input Mask to control data entry in a character field, e.g. you can force users to enter an employee identification code with 2 upper case letters followed by 3 digits (AA999). |
| Choices | A choicelist which allows the user to select from a list of values and prevents the input of invalid data, e.g. only allow valid month names for a UI Control bound to a character column of months (Jan,Feb,Mar,Apr,May,Jun,Jul,Aug,Sep,Oct,Nov,Dec). |
| Validation | An expression that will be evaluated when the column is updated. If the expression returns true the column will be updated. If the expression returns false, the update will be rejected. |
| Validation Error | The error message to be displayed if the validation returns false. |
| Tooltip | Text to be displayed as a tooltip. |
| Mandatory | Check to specify that data must be entered in this column. |
| Auto increment | Check to specify that the value of the column will be auto incremented whenever a new record is added. This makes the column read only. |
| Get data mapping | An expression that will be evaluated to provide an alternative display value for the column. |
| Set data mapping | An expression that will be evaluated to provide the update value for the column. |
| Autosuggestions | An expression that will be evaluated to provide the autosuggestions for the column. |
| Autosuggestion headers | A comma-separated list of column headers for the autosuggestions popup. |
| Check unique | Check to specify that the value of the column must be unique. |
| Index | Check to build an index tag on the column. |
| Column MetaData | Chick to open the MetaData Editor for the column. |
The Auto increment attribute for a Numeric column with 0 decimals (or an Int column) gives a unique value for each record (1,2,3...) so makes the column suitable as a primary key. Alternatively, use the seqno() (1,2,3...) function or strzero(seqno()) ("0000000001","0000000002","0000000003"...) or the guid()) function (36 character unique GUID) in the Default attribute. When the column is used in the UI, it can be made not editable, so that the generated value is not overwritten.
See also Inherit Dictionary Rules.
Modify Column
To modify a column, double-click the column name in the Column Names panel. Alternatively, select the column name in the panel then click the Additional commands (cog) icon at the bottom of the panel and select Modify.

The Table Designer will slide in (Modify A Column dialog prior to v6.3).

The Table Designer buttons are as follows:
- Add: add a new column.
- Delete: delete the selected column. You will be prompted to confirm this.
- Apply: commit any changes.
Use the (x) in the Table Designer top right corner to close the panel. Any changes that have not been applied will be discarded.
The left-hand side of the Table Designer also allows you to select another of the current database's tables from the pulldown and to access the MetaData Editor for the currently selected table.
Delete Column
As an alternative to using the Delete button in the Table Designer, clicking on the Delete (trash can) icon at the bottom of the panel will delete the selected column. You will be prompted to confirm the deletion: click Yes to continue, No to cancel the deletion.

See Also
Databases and tables can also be created using SQL in the console workspace, command window or in a program.
If you have existing VFP Data you can import it directly into Lianja format.
Notes for Advanced Users
For more advanced users, the following commands, functions and commands are also available:
Note1
You can have Virtual Tables that connect to other Lianja or third-party databases.
Note2
Columns can also be altered using the SQL alter table command from Lianja/VFP scripts or the Console Workspace / Command Window.