Getting Started Part 3
Contents
See Also
Extending your first App
Adding a new page

Now let's spice up the app by building an additional page that provides information about employees.
Create a new blank page by clicking on the Page icon in the Form Tools and selecting Blank.
It will be given the default Name, Title and Caption of pageN where N is the next page number.
Adding a new form section
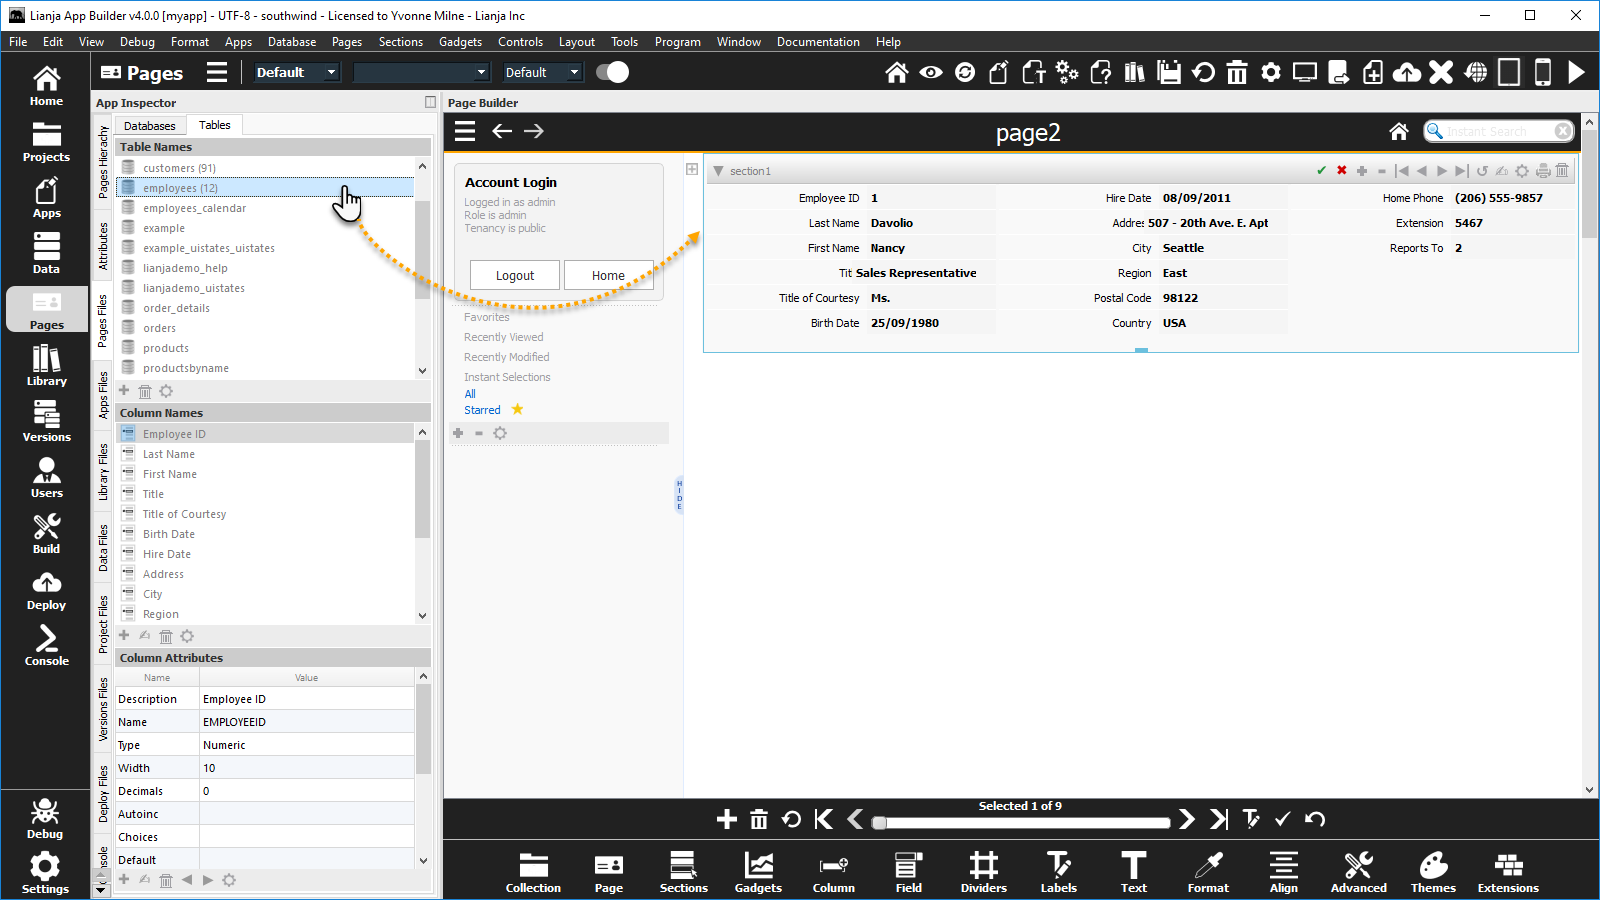
Click on the employees table in the Tables explorer and drag it onto the new Page to create a new Form Section.
Adding an image gadget

Click and drag the blue indicator at the bottom of the Form Section to resize it to a single column.
Then scroll down to the Photograph column in the Columns explorer, select it and drag it into the Form Section.
This will automatically add an Image Gadget for the photo column.
The photo column is a blob (binary large object) previously loaded with an employee photo image file.
Customizing form section fields

The caption for the fields in the form section can be customized by moving the mouse cursor over the caption and clicking the Edit icon.

You can remove fields you don't want to be visible by clicking the Remove icon, which is then displayed.
Dividers

Fields in a Form section can be clicked on and dragged around to change the display ordering.
You can also add subtitles, horizontal separators, column dividers or spacers to the section by clicking on the Dividers icon in the Form tools.
Once the subtitle is displayed in the form section you can drag it around into a suitable position.
Subtitles are horizontal captions that can be placed anywhere in the form. Column Dividers are horizontal captions at the top of a vertical column. Horizontal Separators display as a horizontal line, whereas Spacers are used to provide blank space between Fields or other controls.
Customizing Dividers

Add Subtitles and edit their captions as shown.
Webview section

Now drag the employee Notes field onto the Page. By default, the variable length (memo) Notes field is displayed in a Webview Section.
Note that Webviews allow any web content to be rendered in a section.
The URI specified may contain references to the active data records of other sections.
To reference data in the URI use curly braces e.g. {CUSTOMERS.NAME}. This allows web content to be related to database data.
Customizing the page

Make sure the Page Attributes are selected in the App Inspector and update the Title - the text shown in the Pages menu (click the hamburger icon to display the Pages menu) and the Caption - the text shown in the Page header.
And update the Caption attribute for the Sections.
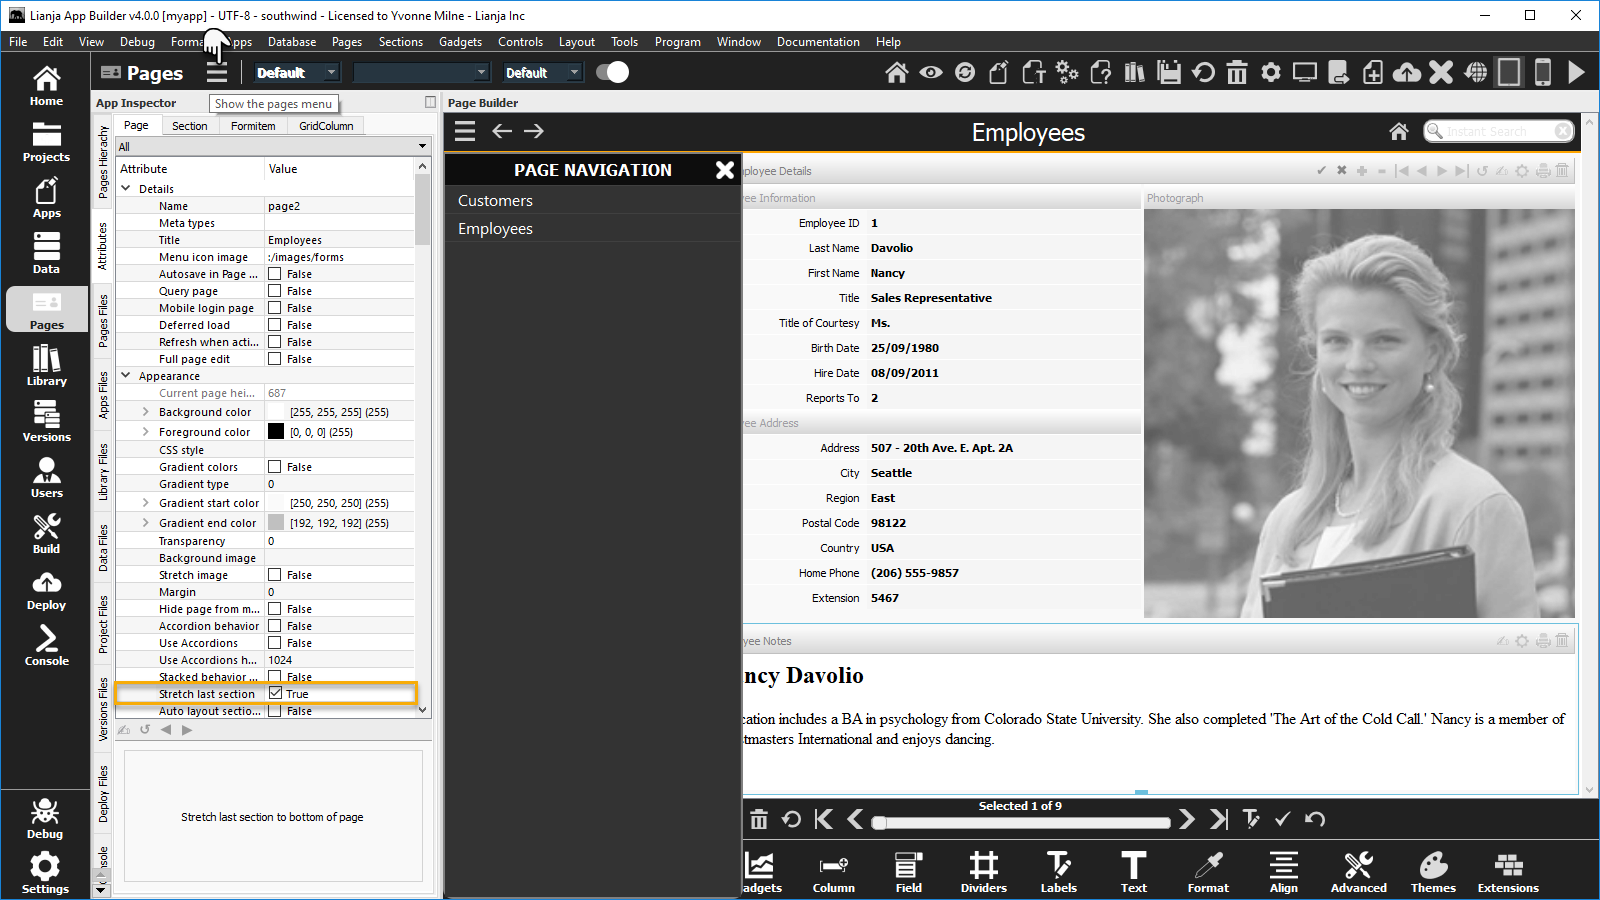
For both the Customers and the Employees Pages, set the Stretch last section attribute to True.
This extends the bottom section to fill the page.
Note that in Development view the Pages menu can be accessed from the hamburger in the headerbar.
Customizing the image gadget

Set the Fixed width and the Fixed height attributes for the image gadget (400).
Desktop App View

Click the Desktop App View and view your extended App.