Difference between revisions of "Page Menu"
Yvonne.milne (Talk | contribs) (→App Settings: Page defaults) |
Yvonne.milne (Talk | contribs) (→Page Attributes) |
||
| Line 81: | Line 81: | ||
==Page Attributes== | ==Page Attributes== | ||
Page Attributes apply to the individual Page. | Page Attributes apply to the individual Page. | ||
| + | |||
| + | ===Title=== | ||
| + | The menu title for this page, e.g. | ||
| + | |||
| + | <pre>Customer Orders</pre> | ||
| + | |||
| + | It can also include an icon. Terminate the title text with a '#', then specify the icon filename using [[Special Filename Prefixes]]. Terminate it with a '#' and add the page id (Name), e.g. | ||
| + | |||
| + | <pre>Customer Orders#app:/cat_contacts_sm.png#customers</pre> | ||
| + | |||
| + | or | ||
| + | |||
| + | <pre>Customer Orders#lib:/images/sales-order.png#customers</pre> | ||
| + | |||
| + | Note the following options available to customize the icon image: | ||
| + | |||
| + | * Postfix the filename with '-' to invert white to black: | ||
| + | |||
| + | <pre>Customer Orders#lib:/images/sales-order.png-#customers</pre> | ||
| + | |||
| + | * Postfix the filename with '!' and a color to invert white to the specified color: | ||
| + | |||
| + | <pre>Customer Orders#lib:/images/sales-order.png!red#customers</pre> | ||
| + | |||
| + | The color of the text can also be customized. Add another '#' after the page id, then specify the color: | ||
| + | |||
| + | <pre>Customer Orders#lib:/images/sales-order.png!red#customers#blue</pre> | ||
| + | |||
| + | Set the Title in the Attributes ([[:Category:App_Inspector_v5|App Inspector]] or Attributes dialog)): | ||
| + | [[{{ns:file}}:l9_page_title1.png|800px|left|link={{filepath:l9_page_title1.png}}|Title]] | ||
| + | <br clear=all> | ||
| + | |||
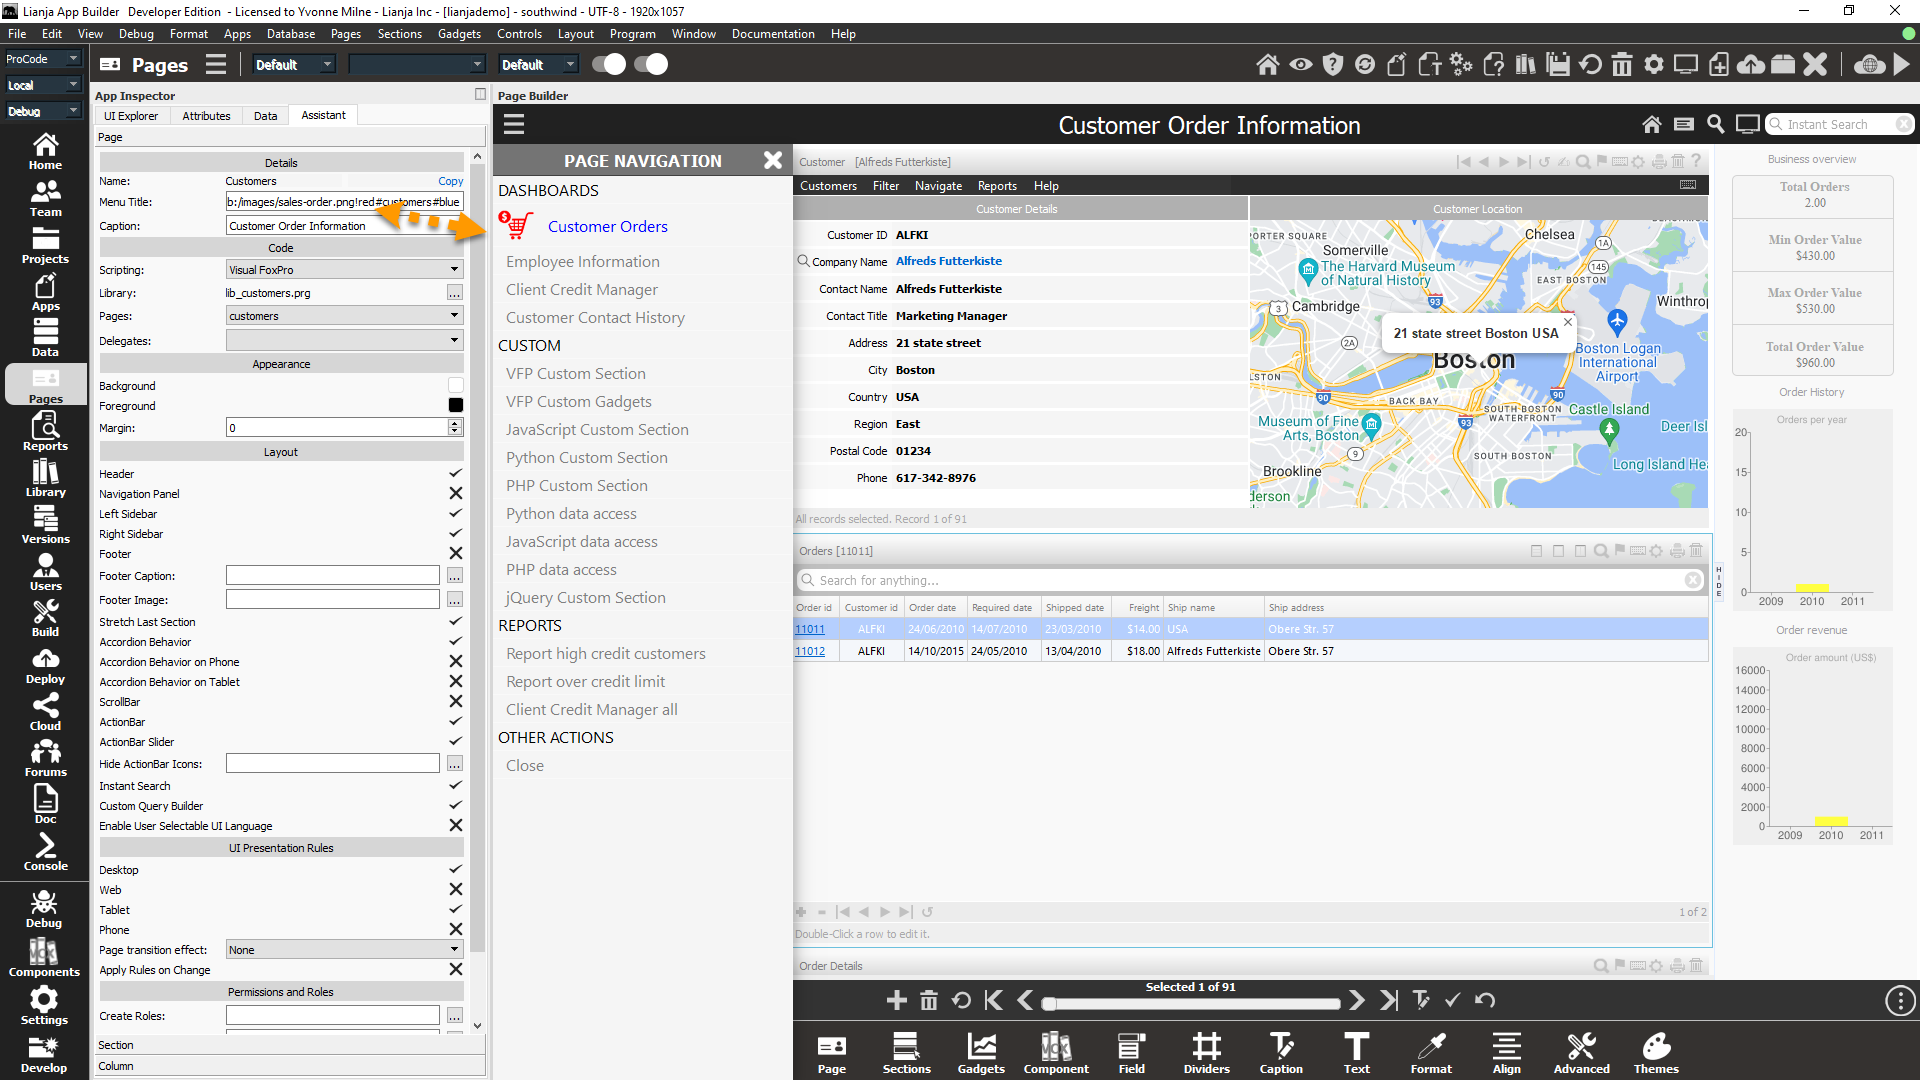
| + | Or in the [[Page Builder Assistant]]: | ||
| + | [[{{ns:file}}:l9_page_title2.png|800px|left|link={{filepath:l9_page_title2.png}}|Menu Title]] | ||
| + | <br clear=all> | ||
===Hide page from menu=== | ===Hide page from menu=== | ||
Revision as of 07:04, 23 May 2023
Contents
Overview
The Page Menu is the primary method to navigate between Pages in the App.
See Also
Understanding UI Navigation, showdocument() and Lianja.showDocument()
App Settings: General App Configuration
Click the Settings icon in the ModeBar to open up the App Settings dialog.
When you have finished editing the settings, click Done to save the changes and close the dialog or Cancel to close the dialog without saving.

These Settings apply App-wide.
Show pages navigation history arrow buttons in page header.
Show pages navigation menu in page header. This is the default setting. Clicking on the 'hamburger' opens the panel Page menu.
Show Page Center
Show Page Center when the navigation menu icon is clicked, instead of the Page menu. For more information about using a Page Center, see Page Center Tiles.
App Settings: Page defaults
Page default App Settings are applied to all Pages in the App.
Choose the appearance of the page navigation menu to use in this App: 'Panel' (default as shown above) or 'Menu'.

- The 'Menu' option is supported on the desktop client only.
Choose the page menu theme: 'Dark' (default) or 'Light'. This determines the page menu background color.
- From v9.0.
- The 'Light' option is supported on the desktop client only.
- The 'Light' option is supported when Page menu is set to 'Panel'.
Dark (default):

Light:

The row height for the page menu items in this App.
- Currently ignored.
CSS for the page menu in this App.
- Currently ignored.
Additional page menuitems in the format caption,action|caption,action... where action corresponds to a showdocument() argument, e.g. exit: or closeapp:.
- From v5.3, desktop and Web client.
- A '!' prefix will add a collapsible group caption.
- A '-' on its own will add a menu separator.
!Other actions|Close App,closeapp:|-|Quit,exit:

Page Attributes
Page Attributes apply to the individual Page.
Title
The menu title for this page, e.g.
Customer Orders
It can also include an icon. Terminate the title text with a '#', then specify the icon filename using Special Filename Prefixes. Terminate it with a '#' and add the page id (Name), e.g.
Customer Orders#app:/cat_contacts_sm.png#customers
or
Customer Orders#lib:/images/sales-order.png#customers
Note the following options available to customize the icon image:
- Postfix the filename with '-' to invert white to black:
Customer Orders#lib:/images/sales-order.png-#customers
- Postfix the filename with '!' and a color to invert white to the specified color:
Customer Orders#lib:/images/sales-order.png!red#customers
The color of the text can also be customized. Add another '#' after the page id, then specify the color:
Customer Orders#lib:/images/sales-order.png!red#customers#blue
Set the Title in the Attributes (App Inspector or Attributes dialog)):

Or in the Page Builder Assistant:
Hide from menu at runtime.
If this is checked (True), this Page's Title does not appear in the Page Menu at runtime. Selection of the Page must be handled programatically. This can be achieved using the showdocument() function or Lianja.showDocument() method
Hide the hamburger menu icon in the Page Header at runtime. Use this to prevent the user from selecting another Page.
Hide the navigation history arrow icons in the Page Header. Use this to prevent the user from selecting another Page in the Page history.
Show Menu
Show the Page menu in the Left Sidebar (True | False). This is another alternative to using the default Page menu or Page Center .
The Show left Sidebar Page attribute must be checked (true) and the Show navigation menu App Setting must be unchecked (false) to enable the Page menu display.
Note: if the Show navigation menu App Setting is unchecked (false) and Show left Sidebar is checked (true), the Page menu will be displayed automatically.
To disable both the Page menu and the Navigation menu (hamburger), check the Show navigation menu App Setting (true) and check the Page Hide hamburger menu attribute (true).
The display of the Page menu in the Left Sidebar is supported on the Desktop client only.
Collections
Collections are used to group Pages together in the Page Menu. Click Collection in the Form Tools and you will be prompted to enter a name for your new collection.

In the Page Menu, select and drag and drop existing Pages to add them to the newly created collection.

After dragging and dropping Employee Information, this Page has now been added to the HR collection.

Collections can also be created by right-clicking in the Page Menu panel and selecting New collection....

Right-click on a collection name to display the context menu. This gives options to Rename... or Delete... the collection.
