Difference between revisions of "A Guide to Deploying Web Apps"
Yvonne.milne (Talk | contribs) (→Deploy Workspace) |
Yvonne.milne (Talk | contribs) (→Quick Deploy) |
||
| Line 29: | Line 29: | ||
Quick Deploy can be run while the App is open. Quick Deploy automatically saves and restores the environment, closing the database and tables for the deployment then reopening them when the operation is complete. | Quick Deploy can be run while the App is open. Quick Deploy automatically saves and restores the environment, closing the database and tables for the deployment then reopening them when the operation is complete. | ||
| − | Quick Deploy | + | Quick Deploy defaults to using the App Deployment Settings: |
{| class="wikitable" width="100%" | {| class="wikitable" width="100%" | ||
| Line 87: | Line 87: | ||
- to the server location /opt/lianja/cloudserver/tenants/public/ (Directory) | - to the server location /opt/lianja/cloudserver/tenants/public/ (Directory) | ||
| − | - | + | - logged in as root (Username) |
| − | - the password (Password) is not | + | - the password (Password) is not specified, but a prompt dialog will be displayed |
<br clear=all> | <br clear=all> | ||
| Line 96: | Line 96: | ||
'''Publisher path''' and '''Publisher arguments''' are only required when using a ''Custom'' '''Publisher'''. | '''Publisher path''' and '''Publisher arguments''' are only required when using a ''Custom'' '''Publisher'''. | ||
| + | |||
| + | ===Setup=== | ||
| + | [[{{ns:file}}:qdeploy1.png|450px|thumb|left|link={{filepath:qdeploy1.png}}|Quick Deploy]] | ||
| + | |||
| + | |||
| + | |||
| + | |||
| + | |||
| + | |||
| + | Click the '''Quick Deploy''' toolbutton in the headerbar to open the dialog. | ||
| + | |||
| + | The first step in using '''Quick Deploy''' is '''Setup'''. | ||
| + | |||
| + | <br clear=all> | ||
| + | |||
| + | Clicking the '''Setup''' button takes you into the '''Deploy''' workspace. Here you can select the databases, Apps and Library files that will be included in your deployment. | ||
| + | |||
| + | [[{{ns:file}}:qdeploy2.png|450px|thumb|left|link={{filepath:qdeploy2.png}}|Quick Deploy Setup: Deploy Workspace]] | ||
| + | |||
| + | |||
| + | |||
| + | |||
| + | Check the box next to the databases, Apps and Library files to be deployed. | ||
| + | |||
| + | While in the '''Deploy''' workspace, you can change the [[#Deployment Settings|Deployment Settings]] to specify an alternative location or additional options as required. | ||
| + | |||
| + | Then switch back to the Pages workspace and reopen the '''Quick Deploy''' dialog using the toolbutton in the headerbar. | ||
| + | |||
| + | Note that while this Lianja App Builder session is running your deploy setup will remain active until you change it. | ||
| + | |||
| + | <br clear=all> | ||
| + | ===Preview=== | ||
| + | [[{{ns:file}}:qdeploy3.png|450px|thumb|left|link={{filepath:qdeploy3.png}}|Quick Deploy: Preview]] | ||
| + | |||
| + | |||
| + | |||
| + | |||
| + | Clicking '''Preview''' will allow you to check the files and destination location of the files to be deployed. | ||
| + | |||
| + | <br clear=all> | ||
| + | |||
| + | ===Commit=== | ||
| + | [[{{ns:file}}:qdeploy4.png|450px|thumb|left|link={{filepath:qdeploy4.png}}|Quick Deploy: Commit]] | ||
| + | |||
| + | |||
| + | |||
| + | When you are ready to deploy, click the '''Commit''' button and confirm when prompted by clicking '''Yes'''. | ||
| + | |||
| + | Then click '''Close'''. | ||
| + | |||
| + | <br clear=all> | ||
| + | |||
| + | ==Deployment Settings== | ||
=Deployment Directories= | =Deployment Directories= | ||
Revision as of 11:43, 7 November 2017
Under construction
Contents
See Also
Deploying to Local Directory, Understanding Live Preview in Lianja
Overview
- Generate HTML5 code from Web App View
- Deploy App, database and Library files
Web App View
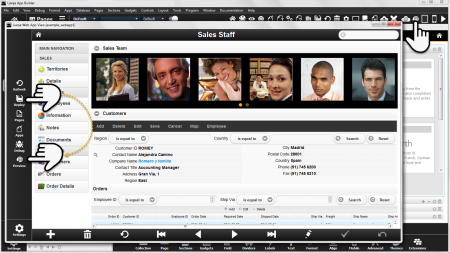
Web App View gives you options to Deploy your App for your local Lianja Cloud Server (this generates the HTML5 index file and copies the App's files to the deployment path) and to Preview the App running in your default browser.
Click the toolbutton in the header to access Web App View.
Click Deploy in Web App View to generate the HTML5 index file and copy the App's files to the deployment path.
For testing purposes, you can click Preview to preview your App live in your default browser.
Deploying
Deploy App, database and Library files...
Quick Deploy
Quick Deploy can be run while the App is open. Quick Deploy automatically saves and restores the environment, closing the database and tables for the deployment then reopening them when the operation is complete.
Quick Deploy defaults to using the App Deployment Settings:
| Attribute | Description |
|---|---|
| Publisher | The way to publish the Apps (Copy | SFTP | Custom). |
| Publisher path | The optional full path of the publisher program, e.g. /usr/bin/rsync. |
| Publisher arguments | The optional arguments to the publisher program, e.g. -avc for rsync. |
| Server | The server IP address or nodename where the App will be deployed, e.g. localhost or myserver.mydomain.com. |
| Directory | The root lianja directory on the LAN or server where the Apps will be deployed. |
| Build an installer | Build an installer for Windows desktop deployment (True | False). |
| Username | The optional username to authenticate with the remote server. |
| Password | The optional password to authenticate with the remote server. |
| Private key (.pem file) | The (optional) private key (.pem file) to authenticate with the remote server. |
For example, here the files will be deployed:
- using Copy (Publisher)
- to the networked drive location G:\lianja\cloudserver\tenants\public\ (Directory)
And here the files will be deployed:
- using SFTP (Publisher)
- to the server on 192.168.80.133 (Server)
- to the server location /opt/lianja/cloudserver/tenants/public/ (Directory)
- logged in as root (Username)
- the password (Password) is not specified, but a prompt dialog will be displayed
Note that the Directory location is the root location. Files will be deployed to the sub-directories of this location. The trailing directory separator ('\' or '/') should be included.
Publisher path and Publisher arguments are only required when using a Custom Publisher.
Setup
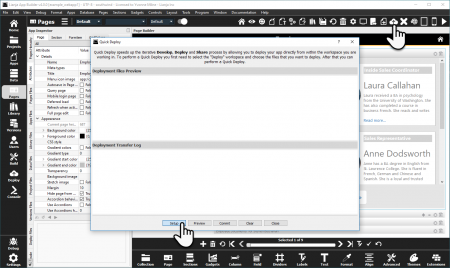
Click the Quick Deploy toolbutton in the headerbar to open the dialog.
The first step in using Quick Deploy is Setup.
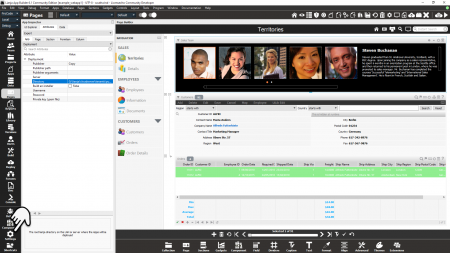
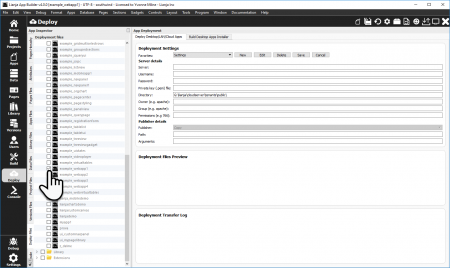
Clicking the Setup button takes you into the Deploy workspace. Here you can select the databases, Apps and Library files that will be included in your deployment.
Check the box next to the databases, Apps and Library files to be deployed.
While in the Deploy workspace, you can change the Deployment Settings to specify an alternative location or additional options as required.
Then switch back to the Pages workspace and reopen the Quick Deploy dialog using the toolbutton in the headerbar.
Note that while this Lianja App Builder session is running your deploy setup will remain active until you change it.
Preview
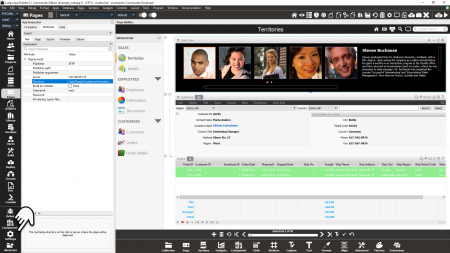
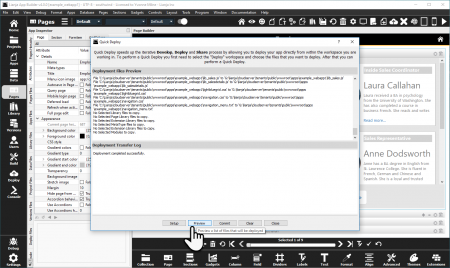
Clicking Preview will allow you to check the files and destination location of the files to be deployed.
Commit
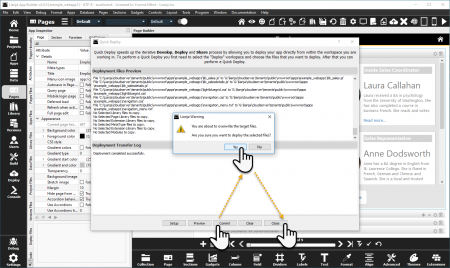
When you are ready to deploy, click the Commit button and confirm when prompted by clicking Yes.
Then click Close.
Deployment Settings
Deployment Directories
Using the standard installation settings, these are the Lianja Cloud Server default directories for Web/Mobile Apps:
Windows
| Files | Location |
|---|---|
| App | C:\lianja\cloudserver\tenants\public\wwwroot\apps |
| Databases | C:\lianja\cloudserver\tenants\public\data |
| Library | C:\lianja\cloudserver\tenants\public\wwwroot\library |
Linux
| Files | Location |
|---|---|
| App | /opt/lianja/cloudserver/tenants/public/wwwroot/apps |
| Databases | /opt/lianja/cloudserver/tenants/public/data |
| Library | /opt/lianja/cloudserver/tenants/public/wwwroot/library |
Mac
| Files | Location |
|---|---|
| App | /usr/local/lianja/cloudserver/tenants/public/wwwroot/apps |
| Databases | /usr/local/lianja/cloudserver/tenants/public/data |
| Library | /usr/local/lianja/cloudserver/tenants/public/wwwroot/library |
